Friday 22 June 2012

Chapter 8 Wrapped frames and paper pulp

this chapter required a series of wrapped frames which would then be dipped in paper pulp and then stitched.i decided to go off at a tangent and make shaped frames from wire, then wrapped inside with wire, old lace, large buttonhole stitch and letters of course.
for the 'E' i crocheted some fine nylon thread randomly and trapped some gun caps
i tend to shy away from the general square shapes and decided to make some small random shapes but join them together. here we have wire with trapped plastic, stitch, knitted strip with trapped plastic letters, bound torn strip and scrim.
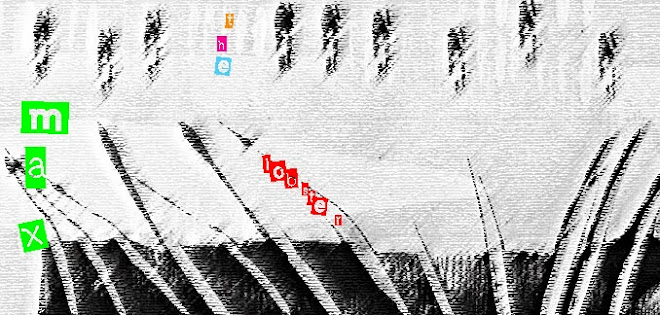
so here is my lobster after adding paper pulp and stitch.
'L' with added buttonhole stitch and spiders web, 'O' looping and linking threads with added paint on the paper and between the lace threads, 'B' i wanted to keep quite plain so added thread and paint on paper.
'S' more random buttonhole stitch, 'T' i left, 'E' added stitch to the gun caps after sprayed black, 'R' i updated the insertions found on Gros point lace.
Finally with this one i just added some more pieces of sweet wrapper stitched in place like a repair. Good old Haribo!

Tuesday 19 June 2012

Friday 1 June 2012

Lets go back to Chapter 5!

it has taken quite a while for me to do this chapter, time to devote to it, waiting for devoré paste then fabric, then i decided to buy a proper screen for screen printing as i knew i would use it again and ........ So here goes and by the way Art Van Go don't stock 'Fibre Etch' anymore as they say it was too harsh! so firstly in #1 i used the devoré paste freehand in the top one and with a 'Thermofax' screen on the lower one. both on cotton organdie to create actual holes.

# 2 for some reason i had a whole collection of Whaleys devoré fabric samples so i tested my screen on these and it was quite interesting to see the different results. so top left is cotton/poly jersey, poly/rayon and linen,silk/viscose satin, then next row down from left silk/viscose Georgette, wool/viscose/nylon, poly/viscose and finally poly/cotton. i decided to buy some of the poly/viscose as this had given a really striking effect.

#3 shows my screen in use with a paper template as a mask between the screen and the fabric, the paste has made the fabric transparent and the brightly coloured squares is the plastic table protector. i decided whilst waiting for various deliveries that i would prepare templates and cut outs ready, so i worked with images i had used before for previous chapters.all the pieces are about A4 in size.

#4 once the paste is dry (and it can take quite a while) it is ironed on a gentle setting till it turns brown. sometimes the really brown areas were more difficult to remove than the less brown. i found the best way to remove it was to immediately put it in water and gently remove the burnt fibres which smelt like crumpets! these procedures were carried out in well ventilated areas.

#5 and voila a devoréd image. this one i use torn strips of paper and my cloud images from before (looks a bit Matissey)

#6 i used a paper cut mask of the image below, using both the positive and negative pieces of paper. i think i got slightly carried away with this method and i am certainly smitten with the effect.

my husband said to me 'what on earth do you want to take a picture of that for?'

#8 i used letter cut outs and paper offcuts for this one. it is also the same as image #4 where i had stitched a zig-zag in the top right creating a wonderful texture, might have to try some more of this

#9 i then added colour to a couple of pieces, the above i had used stitch, paper masks and thread masks to create the images. i wanted to colour in isolated areas so i used Koh i nor dyes and painted them on (not sure how fast they are! but it achieved the effect i wanted.

#10 just adding a bit of colour. i am keen to continue with these perhaps dyeing them and over printing but at the moment i feel i have done enough?!