 hope you all have a Merry Christmas and a peaceful, relaxing and productive New Year.
Friday 23 December 2011
Merry Christmas to all
hope you all have a Merry Christmas and a peaceful, relaxing and productive New Year.
Monday 19 December 2011
At last!
 At last after a lot of hard work the Royal Albert Memorial Museum and Art Gallery in Exeter (where I work) has been unlocked and re-opened. Personally I think it's stunning and am very pleased with all our efforts. There were a few sleepless nights thinking of the correct shape for hips and busts!!!! but well worth it. If any Distant Stitchers are in the area anytime and want a guided tour but particularly the textiles and costume I would love to see you.
Sunday 11 December 2011
Better to be busy than bored!
 i have been busy believe it or not but the November sketchbook challenge has slipped and it is unlikely i will get to do anymore with this. i started with the best will in the world with the above sketch of a pile of bowls and cups/saucers however thats as far as it goes! Musem opening and lace and Brewhouse have taken over (more on these another day). However i do hope to work on Sian's competition which sounds fun.
 seeing Sian's drawing for her 'o' level(?) reminded me of something i did many years ago too, an illustration of a hearty english breakfast reflected and distorted in shiny teapot. back to the lace now!
Sunday 27 November 2011
I think I've done it!
 just to recap, the above image was my initial inspiration
 and here is my finished piece. i photographed it this time with flash which has brought out the reflective thread. i have found it quite difficult making the decisions that have got me here but i at least am pleased with it. after feedback to my last post and thank you everyone who has added comments, i went back to the drawing board and had a rethink. i really felt what i had was far too busy although i was really happy with the plastic spoons! so i simplified my ideas. it is very hard getting rid of things but it has to be done sometimes.
 i decided what i really was pleased with was the back panel and the strip of letters. so i thought in order to tie them together (not physically) i would work another piece based on the first panel but re-arrange the letters and possibly cut them out. this time i worked them in the bright colours from the door but still with the reflective thread outlining. i chose a pink, blue, yellow and green and worked the same stitch as the first panel.See above. afterwards i stencilled dots as with the other panel but this time in the space around the letters. you wouldn't believe how long i looked at the 3 pieces hanging together in various configurations before i finally plucked up the courage to CUT! i loved the new piece but didn't feel it worked 'as a whole'.
 a detail of the 3 together showing the final cut up piece, it was worth the cutting i feel as now you can really see all 3 layers. it looks slightly grey but i think it is mainly the way i have photographed it.
 a side view showing the 3 layers together.
 i also thought long and hard bout the hanging mechanism and decided i wanted them to appear 'floating' in the air as if the letters had just come off the door, so they are each individually suspended with fishing line. the first panel has a piece of 'Melinex' or Mylar to the Americans stitched along the reverse at the top and lower edges to stop them curling, again stitched with fishing line so it isn't visible. to give the s&m (Sounds odd)in the next panel stability they also have a Melinex backing. i think with this hanging solution they could all be re arranged if necessary.
Total time taken:
(including pieces made but not used) 100hrs
Costing:
organdie £12.24
reflective yarn £02.00
flourescent yarn £00.50
Fabric paint £01.00
sewing thread £03.00
Melinex £01.50
felt £03.50
TOTAL £23.84
Friday 11 November 2011
Back to the Door - Assessment panel/hanging
 i started work on this piece way back in the summer after my initial proposal way back when! after Sian's suggestions and feedback i decided to get on with it and work my first section. but just to recap, i proposed to work a series of semi transparent layers, cut them up and try embedding something in resin!
 i changed the size to 36.5cm wide x 99cm long (initial proposal too small) but still in proportion to the door. Above first section worked on undyed cotton organdie. outline worked in retroflective thread with brown and purple random hand stitches worked to imitate loosely spray actions.
 i then sat with this while i went on to the next panel which incorporated a piece of paper taken from a similar door which was composed of printed circles. i then went back to panel 1 and printed some black circles randomly on the letters.
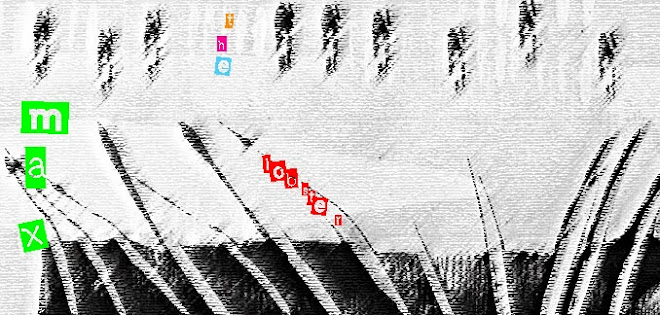
 section 2- thought i would now work with a series of letters taken from a section of the door and went back to a previous idea of letters along an edge. the plan was to make various letters from the words 'feed me' and then attach them to an edge of organdie. once i had made the letters i had an epiphany and decided to just link them to each other
 above and below detail of letters some made with felt base and others completely transparent. i used found paper, a print of the door, some of my notes on the project, tissue paper and organdie with hand stitch and polyester film to encapsulate everything.
 the next section (apologies for colour but it is on undyed organdie!)i took an image and repeated it by making a stencil and using fabric paint in purple with white spots on top. found plastic spoons were attached (a reference from the door)and some fuzzy felt letters which i still have to attach.
 detail
 i then made another panel with the same image as the first but stencilled the letters with brown fabric paint and outlines with retroflective thread.
 detail
 then i tried various mock ups- above mock up shows first panel with second over top. it was at this point i did the brown panel to go under for extra emphasis, but i wasn't sure i liked the outcome.
 i then did the above mock up with the brown 'panel' behind, spoons and letters over it and the paper cut outs are a possible idea for cutting up the first panel and linking the letters but i am not sure whether to just use the single layer of organdie or to stitch them onto the clear polyester film to give them rigidity?! i have ruled out the resin idea. some good shadows are possible with this arrangement but i am wondering whether it is all too busy but then so is the door!
for display the sections would be staggered with space between them or cut out and pinned onto a solid backboard so they stand out? any suggestions?
Monday 31 October 2011
Certainly not Queen Victoria's fig leaf!


Thursday 27 October 2011
October Sketchbook and its nearly November!
 i chose this month to work with a fig leaf and only really started this half term. we have a fig tree in our garden which usually produces copious amounts of figs which are truly scrumptious. i have always been amazed at the size of the leaves! so first drawing using a basic pencil and outline.
  then ink brush and more pencil, the one on the right i didn't look at the page and it was done quite quickly hence the overlaps
 then going on to wet paper, water soluble crayon and more quink!
 then i started playing around with the veins.
 onto colour with koh i nor and looking at small details, i love the shape of the 'u' between the lobes of the leaf
 the leaf is now beginning to curl at the edges - i should really take a picture of it.
 above working quickly and again not looking at the page
 i have now got obsessed with the veins, making barren Christmas trees!
 still looking at patterns within the leaf and using it to print with.
Sunday 23 October 2011
Bristol@last
 we got to Bristol at last combining Nelson Street, Louise Bourgeois/Tracey Emin exhibition and relatives! typically we chose a day when there was road resurfacing going on so our views were marred by lorries! however that didn't stop us enjoying it (us being myself and 11 year old). he was doing the directing as to which ones to record! there is an amazing amount of variety and the following are just a small handful.
 we were walking down the street and my son said 'that's a good one', i said 'where'? looking all around! how could i have missed it? i have since seen a video on 'the Wooster Collective' where the artist said it was based on 'paint the town red'
  beautiful lettering
 this chap had 4 arms and legs!
 Free Tibet, a cause dear to my heart
 dust graffiti!
 i hope the Tracey Emin/Louise Bourgeois exhibition at the RWEA hasn't traumatised my son but it was worth it for the Damien Hurst sculpture outside! So that says it all!
Friday 21 October 2011
Final paperwork and authentication
 Here is the final paperwork for this module (i think) as i'm still working on my assessment piece i will fill out the Student evaluation later
 Authentication - felt making
Textile artists Felt and text Chapter 13
 I have chosen to study two very different artists! Joan Livingstone who works in mainly 3D felt and Rosalind Wyatt who works directly with script. They are not technically 'embroidery' artists but they do use stitch! I first came across Joan Livingstone when I bought a Portfolio Collection book on her a few years ago. I can group her with other artists like Joseph Beuys and Eva Hesse who I love. I love her precise almost perfect way of piecing things together along with the simplicity of her pieces. You can see more of her work here

 the other artist i am looking at i came across only recently when i was searching for people who use text in their work. Originally she was and still is a calligrapher but has branched out into textiles. i have always loved the jacket worked by Agnes Richter in the prinzhorn Collection so when i saw Rosalinds work i loved it. Her website is a must, especially if you love the sound of Bill Nighy's voice!!

Subscribe to:
Posts (Atom)